Phase 01
Architecture & Data Strategy
We map backend contracts, data flows, AI model constraints, and integration boundaries before writing a single line of code. Every decision is grounded in your business model and unit economics.
We engineer intelligent SaaS platforms and custom AI sales agents that capture leads, automate your follow-ups, and run revenue operations around the clock — so growth stops depending on headcount.
AI-native systems built on
Core Capabilities
We don't build brochure sites. We engineer intelligent platforms that automate revenue, eliminate busywork, and compound growth from day one.
Custom LLM-powered chatbots that qualify leads, answer objections, and book strategy calls for you — 24 hours a day, 7 days a week, without a single salary on payroll.
We connect your APIs, databases, and third-party tools into seamless pipelines that eliminate manual data entry, reduce human error, and remove operational bottlenecks overnight.
Scalable, headless web applications built on Next.js and Supabase — from MVPs that validate in weeks to full-scale platforms handling thousands of concurrent users.
Templatized content engines powered by structured data that generate thousands of optimized pages — designed to dominate organic search and compound traffic while you sleep.
Solutions
Purpose-built digital ecosystems for the verticals we know best, each tuned to the exact way that business makes and keeps revenue.
Third-party disintermediation
Escape 25-30% aggregator commissions with a white-label ordering app and a live driver-tracking dispatch.
View solutionOTA fee mitigation
Reclaim margin from global OTAs with direct booking, a live room matrix, and multi-role staff scheduling.
View solutionFragmented service booking
A unified pet medical and lifestyle reservation wizard that ends scattered, fragmented bookings.
View solutionHigh-value inbound authority
Convert authority into pipeline with an embedded ROI discovery calculator built for high-value inbound.
View solutionEngagement & retention
An interactive syllabus builder and progressive player engineered for engagement and retention.
View solutionChurn defense & retention
Defend against churn with a dynamic pause-credit engine that recalculates contracts in real time.
View solutionFrictionless patient pipeline
A HIPAA-aligned calendar orchestration view that removes friction from the patient booking pipeline.
View solutionFrictionless transactions
Optimized multi-step checkouts engineered to keep transaction pipelines fast and frictionless.
View solutionRecurring subscription models
Tiered pricing toggles and a metered-usage simulator built for recurring subscription revenue.
View solutionCore Web Vital preservation
An instant edge-delivery MDX reading canvas that preserves Core Web Vitals at scale.
View solutionStatic Sites vs. Intelligent Systems
Most freelancers hand you a static brochure and walk away. We deploy AI-powered platforms that capture, qualify, and convert on autopilot.
Delivery Models
Choose the engagement that matches your risk, timeline, and business model.
Our Process
Four phases. Zero ambiguity. From data strategy to launch-day analytics — every sprint moves revenue closer.
We map backend contracts, data flows, AI model constraints, and integration boundaries before writing a single line of code. Every decision is grounded in your business model and unit economics.
We wire up the LLMs, configure webhook pipelines, connect your headless CMS and CRM, and build the automated workflows that turn raw user intent into qualified pipeline — all on a tested, observable infrastructure layer.
We deliver an Awwwards-level interface with spring-physics interactions, kinetic typography, and buttery 60 fps scroll narratives — because premium positioning demands a premium digital experience.
We deploy with analytics, error budgets, and automated alerting from day one. Post-launch, we iterate on conversion data and scale the AI agents as your lead volume compounds.
Featured Systems
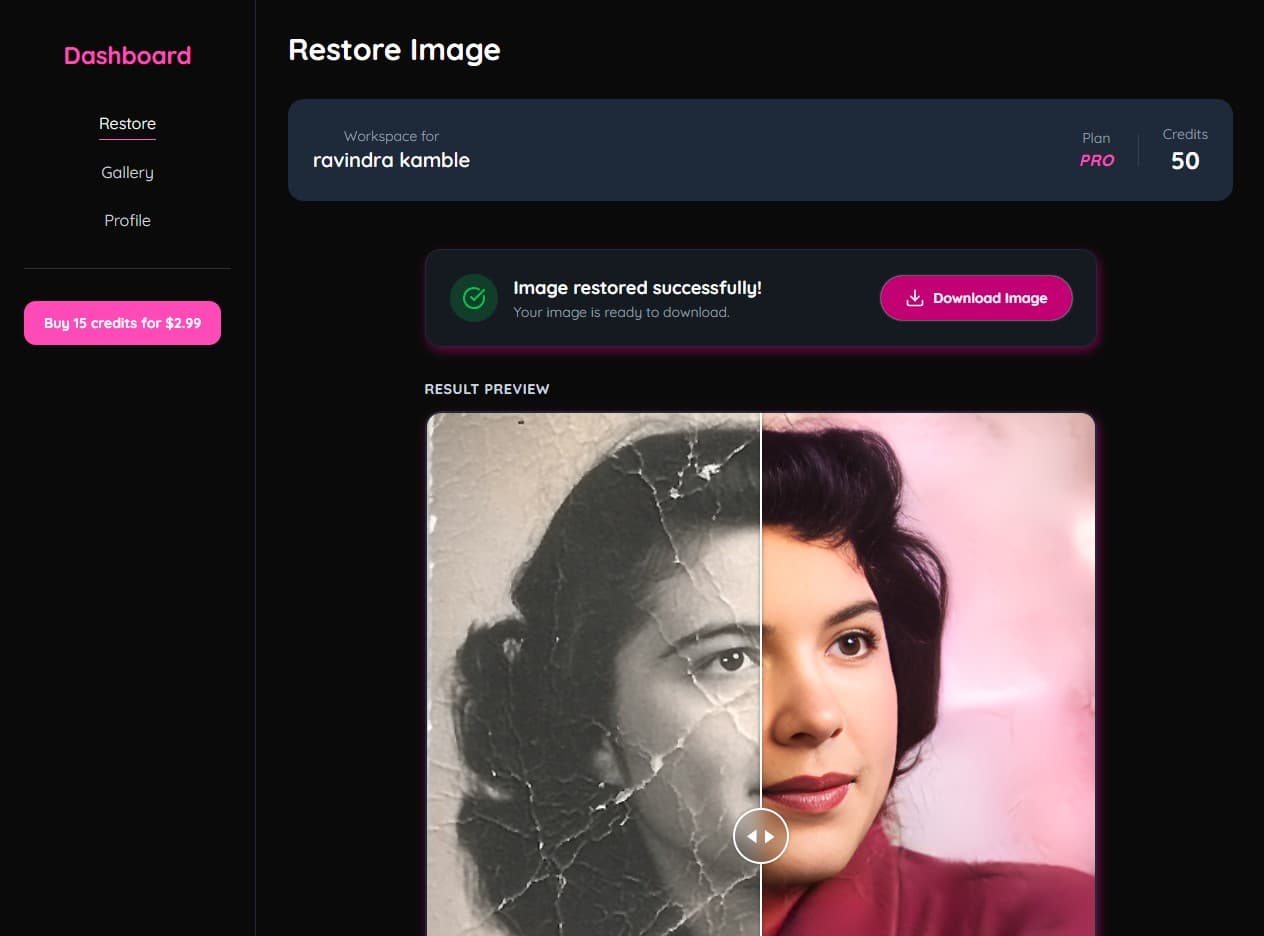
A fully monetized generative AI platform that breathes new life into damaged photographs. Features a scalable user credit system with free-tier onboarding, seamless Razorpay checkout for credit top-ups, and instant, high-fidelity image processing.
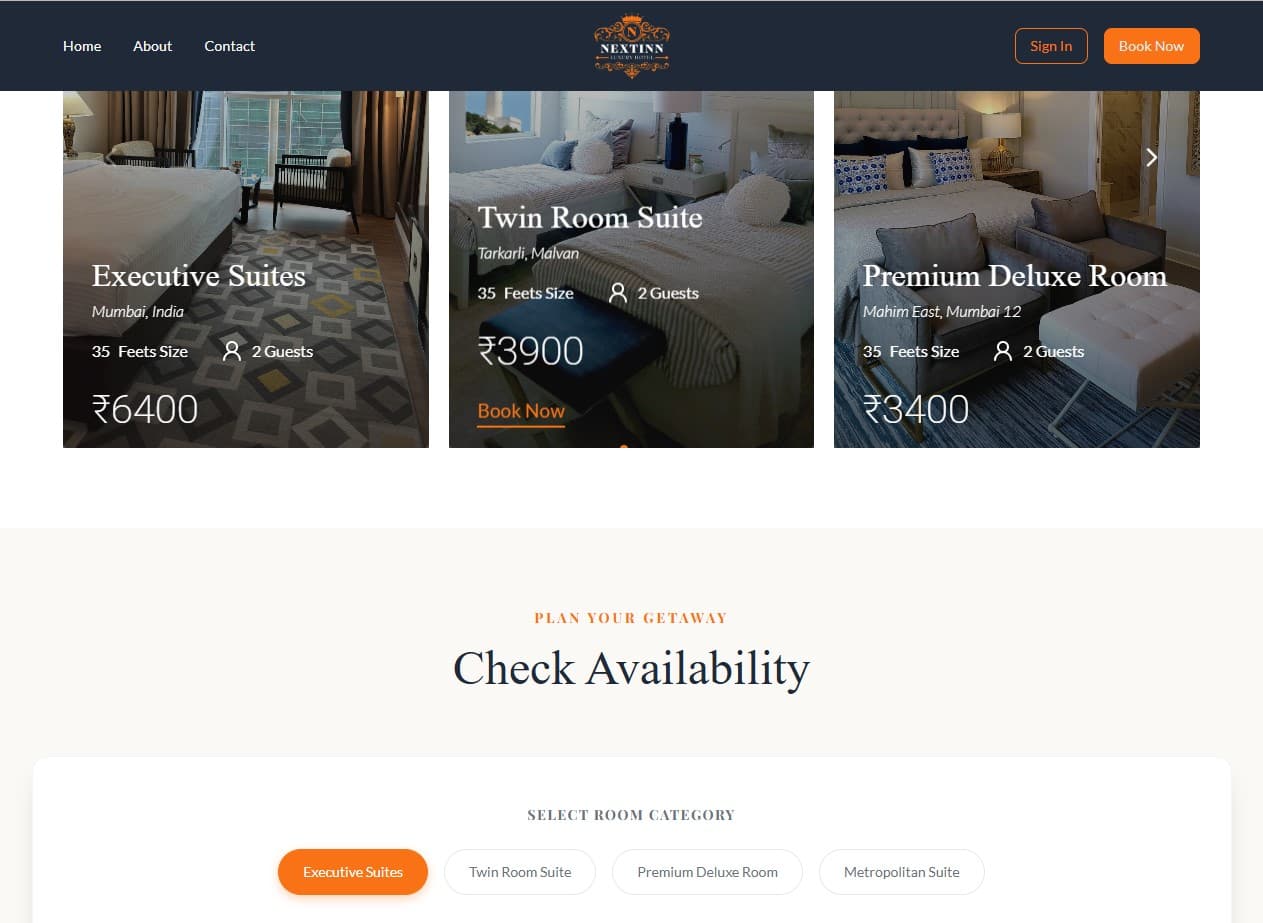
A secure, all-in-one hotel platform designed to drive direct reservations. Guests can seamlessly check real-time availability and book rooms, while hotel staff and ownership utilize dedicated admin dashboards to control daily operations, handle reviews, and oversee high-level business performance.
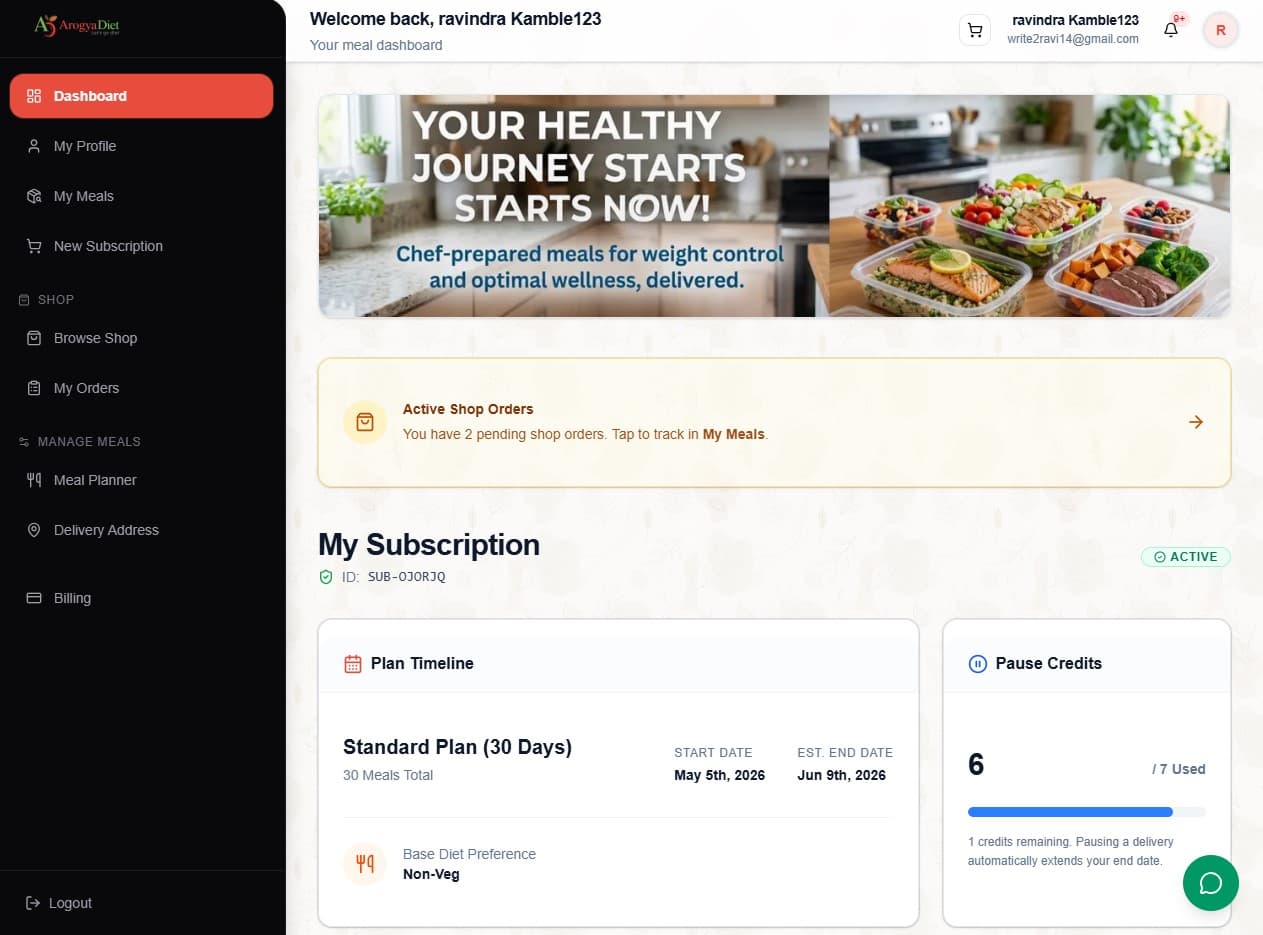
A complete end-to-end food delivery and subscription platform. Features interconnected portals for Customers to manage meal plans, a native Rider app for live delivery tracking, and powerful Master Admin & Franchise dashboards to seamlessly oversee all daily operations and logistics.
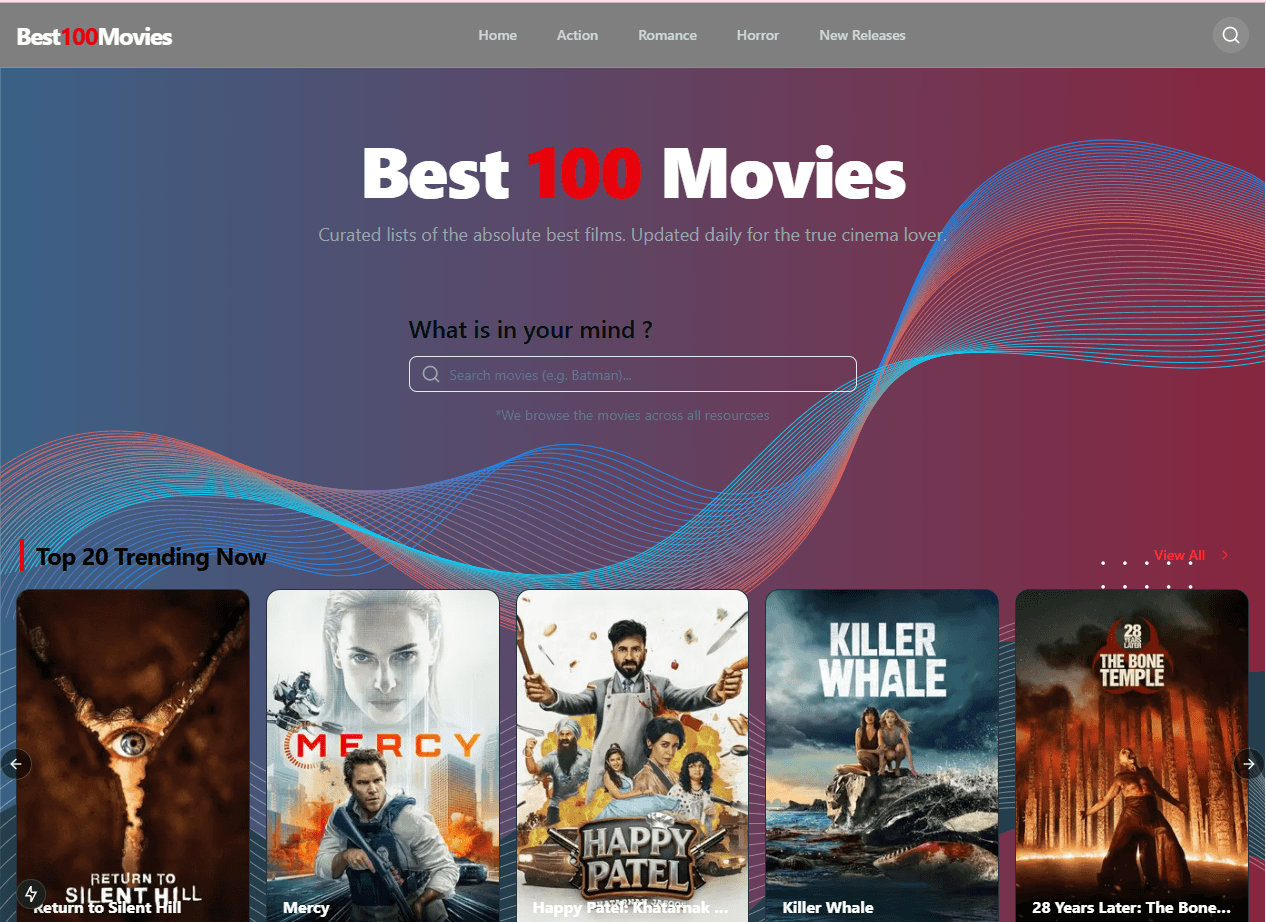
A high-performance entertainment portal engineered to capture organic search traffic through programmatic SEO. It automatically aggregates thousands of real-time movie records via external APIs, while empowering site owners with a seamless headless CMS to effortlessly curate featured content.
Journal
Engineering deep-dives, local SEO playbooks, and the systems behind high-conversion business platforms.
Let's architect your AI automation engine — so revenue grows while your team stays lean.
Free strategy call · No commitment · Response in 24h
Initialize
No forms. No waiting. Talk directly to Sweety — our AI SDR — and get a strategy recommendation in under 2 minutes.
> Click below to initialize a live strategy session
Powered by our proprietary LLM pipeline · Response in <5s